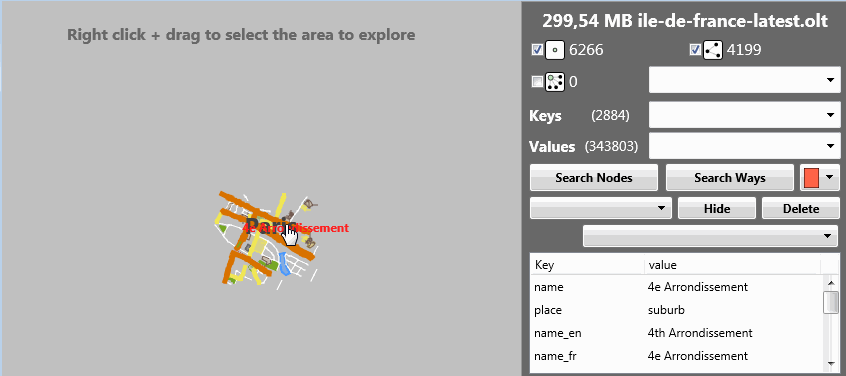
Style sheet
To be able to display all your data easily, use styles.
For this, TECNativeMap has the Styles property
map.Styles.LoadFromFile(your_filename);
map.Styles.Rules := all_your_rules;
map.Styles.addRule(your_rule);
A rule can decompose in a selector and a list of properties placed between { }
Selector {prop1:value1;prop2:value2}
Style selector
The selector can be the name of a Group, an element type (marker, poi, line or polygone), the name property of the element, a set Property:value
You can also aggregate these different possibilities (groupe+type+property:value)
#Group_Name {} //
for all element in the group
.Marker {} // for all
TECShapeMarker
#Name_Of_Shape {} // only for this
name
.property_name:property_value {} // for
all items with this value
#Group_Name.Polygone {} // only for
TECShapePolygone in this group
.Line.property_name:property_value {} //
only for TECShapeLine with this value
For the TECShapePOI you can also select depending on the type
.Poi.Ellipse {}
.Poi.Star {}
.Poi.Rect {}
.Poi.Triangle {}
.Poi.Diamond {}
.Poi.Hexagon {}
.Poi.Text {}
It is also possible to define rules if the element is hovered by the mouse, if you press on it, if it has selected or if it has focus.
map.styles.addrule(':hover {color:green}');
// the border of the lines hovered by the mouse is 4 pixels
map.styles.addrule('.line:hover {bsize:4}');
// all shapes selected or focused is red
map.styles.addRule(':selected, :focused {color:red}');
// enlarge the selected markers
map.styles.addRule('.marker:selected {scale:1.2}');
map.styles.addRule('.marker:pressed {scale:2}');
You can apply the same properties to several selector separated by commas
1Select1 , Select2, Select3 {...}
Use ClearSelector to remove all rules associated with a selector.
Items that have already been modified by a style you remove keep their appearance !
1Style property
The properties available are :bcolor
(BorderColor)
bsize
BrushStyle (vcl
Clear|Cross|DiagCross|BDiagonal|Horizontal|FDiagonal|Vertical|Solid)
( fmx Graphic )
Color
FontItalic (true|false)
FontBold (true|false)
Fontsize
FontFamily
FontColor
fcolor (fill color)
fopacity (0-100)
graphic (url|base64,data_png_in_base64,
index ImageList)
hbcolor (hover border color)
hcolor (hover color)
height
level
opacity (0-100)
penStyle (solid|dash|dot|dashdot)
unit (pixel|meter)
visible (true|false|[text])
weight
width
zindex
StyleIcon
(3D,Flat,FlatNoBorder,Svg,OwnerDraw)
(TECShapeMarker)
Scale (double) (TECShapeMarker &
TECShapePoi);
For the colors you can use the syntax #RRGGBB or $int_value or directly a name (red, black, green etc.)
1You can also create a color by specifying two colors and a percentage of mixture, or lighten / darken it
2map.styles.addRule('.line {color:gradient(Red,Yellow,0.6)');
// dark with a force index of 128 (max 255)
map.styles.addRule('.line {color:dark(Red,128)');
// light default force index = 32
map.styles.addRule('.line {color:light(Red)');
Using [text] It displays the item only if PropertyValue['name']<>'' ou PropertyValue['addr_housenumber']<>''
3Excerpt from a style sheet
.Polygone
{weight:0;zindex:-1;}
.marker {zindex:11}
.marker:hover {scale:1.5}
.marker.kind:embassy{visible:true;graphic:base64,iVBORw0KGgoAAAANSUhEUgAAAA4AAAARCAYAAADtyJ2fAAAAAXNSR0IArs4c6QAAAARnQU1BAACxjwv8YQUAAAAJcEhZcwAADsMAAA7DAcdvqGQAAAAYdEVYdFNvZnR3YXJlAHBhaW50Lm5ldCA0LjAuM4zml1AAAAB+SURBVDhPYxgY4Ln8yn8oEwNM23vuP0heac4NMA3iQ6WAYNItMAcmsfvcETBtt+Tqf7AcOoYDGAddAS4MBzAOugJcGA5gHHQFuDAcwDjoCnBhOIBx0BXgwnAA46ArAGJQyCKHNGrUgRQBAUwCe5xhA1CNpIOhoxE1pGgKGBgAbpXuX0CxebIAAAAASUVORK5CYII='}
.kind:rail
{bcolor:#0C0D0D;color:white;weight:1;bsize:3;penStyle:dash;}
.kind:river {color:#54b4eA;weight:4;}
Define a style using the properties
You can freely assign properties to your elements, they are of the form "name": "value".
var M:TECShapeMarker;...
M := Map.addMarker(map.latitude,map.Longitude);
M.PropertyValue['my_tag']:='value_tag';
// you can also use
M['my_tag']:='value_tag';
// groups can also have them
map.shapes['tag']:='value';
map['group']['tag']:='value';
//To define a rule that applies only if a property has this value
.name:value {color:red};
// only to markers with a "name"="value" property
.marker.name:value {color:blue};
// for all elements having a "name" property whatever its value (except empty)
.name:* {color:indigo};
Conditional property
To apply a rule based on a PropertyValue, use the if property
With the following rules the villages with a population of less than 5,000 inhabitants appear in green, those with a population > 6000 in blue.
.kind:village
{if:population<5000;fontsize:12;color:green;}
.kind:village
{if:population>6000;fontsize:12;color:blue}
You can use as a comparator =, % (modulo) , !=, >, >=, < et <=
You can test "special" properties
Index
'.poi {if:index>4;color:red;hcolor:yellow}'
// apply the rule for the last poi in the list
'.poi {if:index=last;color:black;hcolor:white}'
// apply the rule for even indexes
'.poi {if:index%2;color:black;hcolor:white}'
RTL ( vcl ou fmx)
OS ( windows, mac ,android ou ios)
HOLE (true ou false) to detect if a polygon is a hole in another polygon, TECNativeMap does not support polygons with holes, This test at least to assign a color for holes.
Rule based on the Zoom
You can set the zooms for which the rule applies, just add at the end of selector [zoom valeur] or [zoom valeur1,valeur2] , [zoom *] indicates that the rule applies for all zooms
.Poi.Text [zoom
*]{if:kind=building;visible:false;}
.Poi.Text [zoom
18,19,20,21,22]{if:kind=building;visible:[text];}
.Poi.Text [zoom *]{if:kind=chapel;visible:false;}
.Poi.Text [zoom
19,20,21,22]{if:kind=chapel;visible:[text];}
Multiple values based on the zoom
For the StyleIcon, FontSize, Scale and Weight properties you can set several values that depend on the zoom level
The syntax is zoom_mini-zoom_max=value,zoom2=value
#.poi {fontsize:17=6,18=8,19-20=10;}
// flat marker for zoom 0 to 17, siDirection for zoom 18 to 20
.marker {styleicon:0-17=flat,18-20=direction}
Define a name for a value
You can name your values and use the name instead of the value.
@scale-suburb-village {0-11=0,12=1.2,13=1.5,14=1.6,15-16=1.9,17-20=2.5}
.poi {if:place=suburb;fontsize:12; scale:@scale-suburb-village;color:@dark;width:0;yanchor:0;}
You can use styles without using vector tiles, they apply to all your elements
1The unit uecOSMStyles_standard declares the constant UEC_OSM_STYLESHEET, these are the styles used in the demo OSMViewer
map.styles.Rules := UEC_OSM_STYLESHEET;